How Warp Uses Warp

In this article, members of the Warp team talk about how we’ve integrated some of Warp’s cooler features into our day-to-day workflows. Specifically, we go beyond expected features like split panes and tab completion and focus on unique features in Warp that improve on the terminal status quo. We’re excited about what we’re building and hope that this post gives some insight into how our team works!
Block Sharing - David Stern (Engineer)
Block sharing in Warp allows users to share a block – a grouping of a command and its output – easily with coworkers or teammates by creating a web permalink that teammates can visit to see the terminal’s input and output for a given command.
Developers tend to take screenshots of terminal output, but screenshots have a number of problems. By their nature, you can only capture at most one screen of text, and commands often produce much longer outputs. On top of that, recipients cannot search, select, or copy-paste text in screenshots. This in turn makes it hard to find specific strings or errors in the text.
As another sharing solution, developers also try copy-pasting text from the terminal, but that has its own issues - it’s often hard to read output because colors are lost and text-wrapping is wrong on different screen sizes.
Block sharing fixes these issues and has completely replaced screenshotting and copy-pasting terminal output in our team.Colors and text-wrapping are preserved, so developers can easily spot things like specific line changes (eg. git diff) or untracked files (eg. git status). Under the hood, colors and fonts are being stored by using ANSI escape sequences (read more here) and text formatting is stored as a series of JSON objects that preserve newlines as well as spacing between characters.
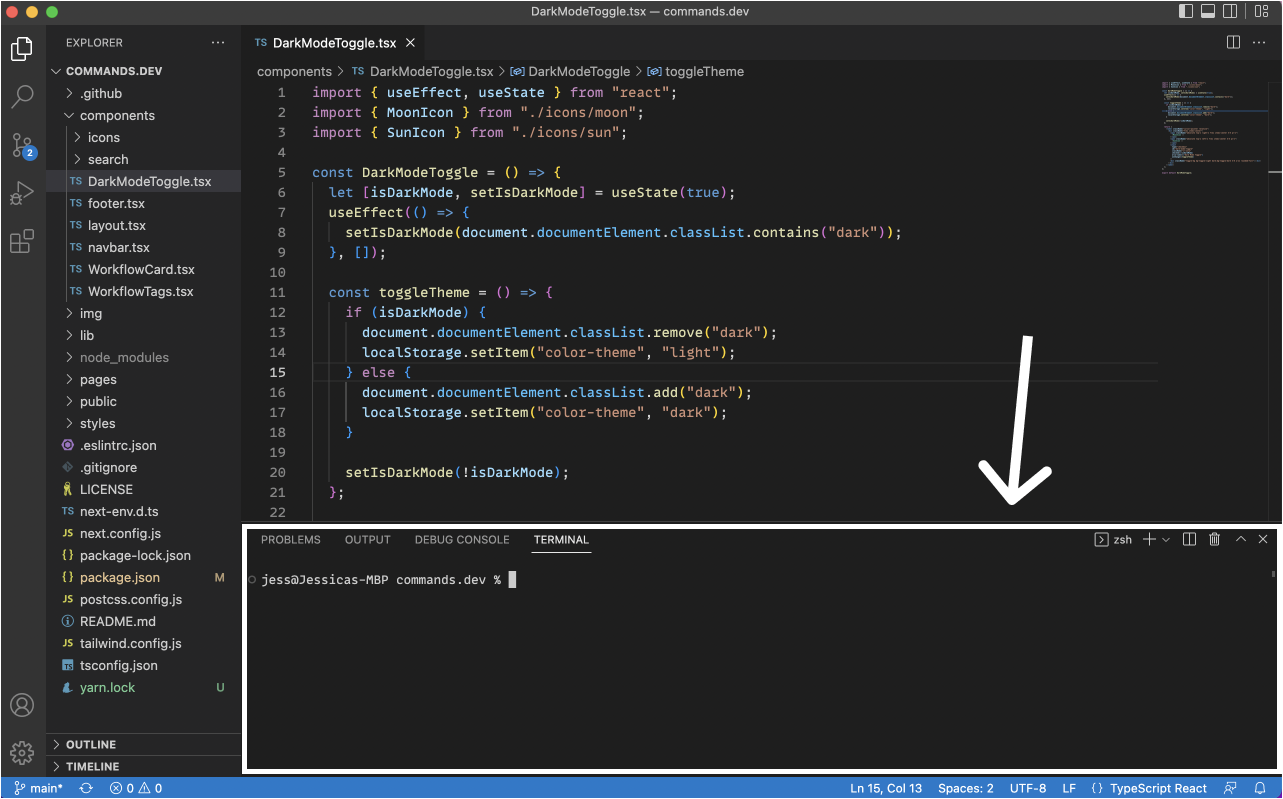
Here’s an example of a block I shared in Warp’s #help Slack channel about a month ago. I was getting multiple error outputs from the command cargo clippy -p warp, which runs a Rust linter on the Warp codebase.
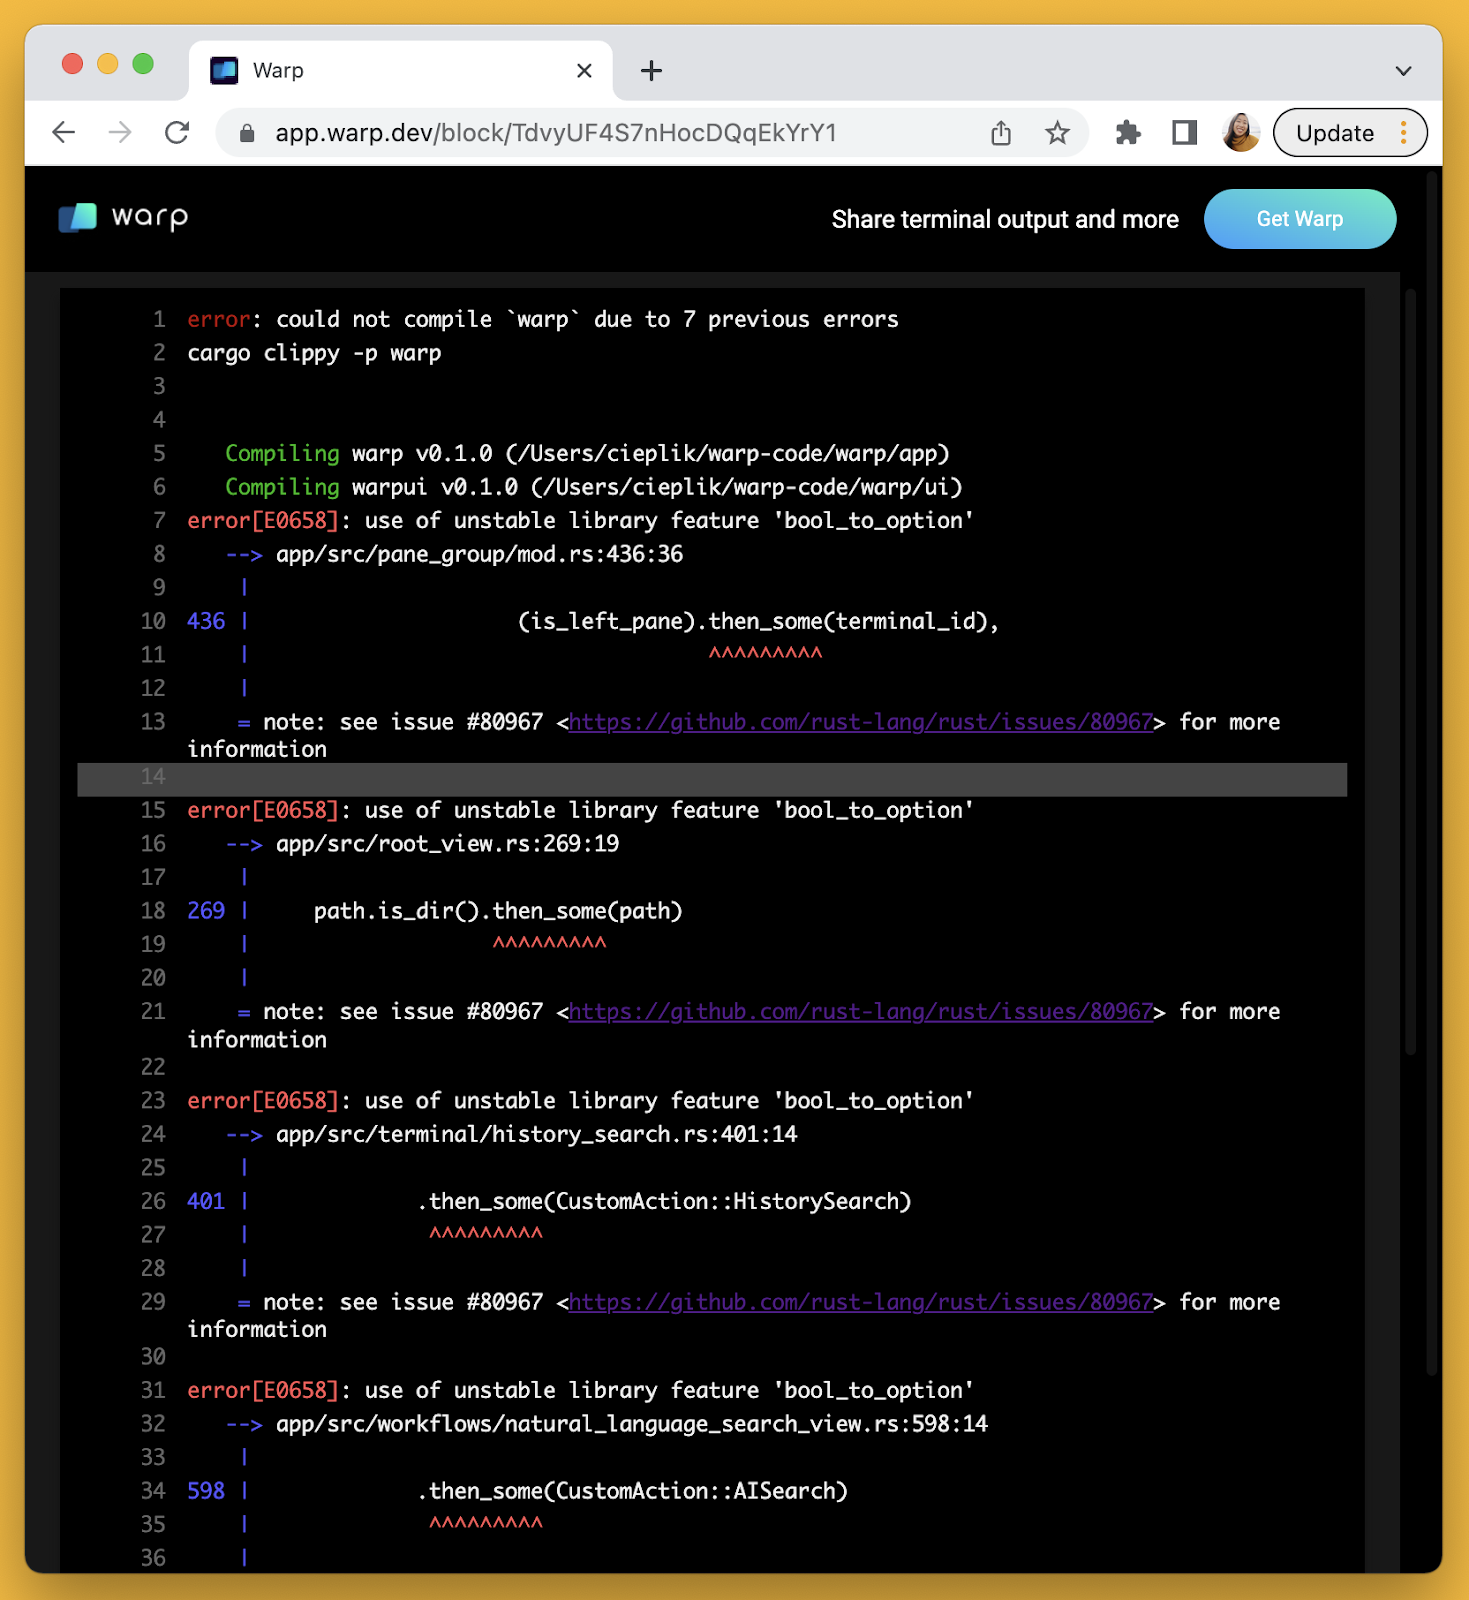
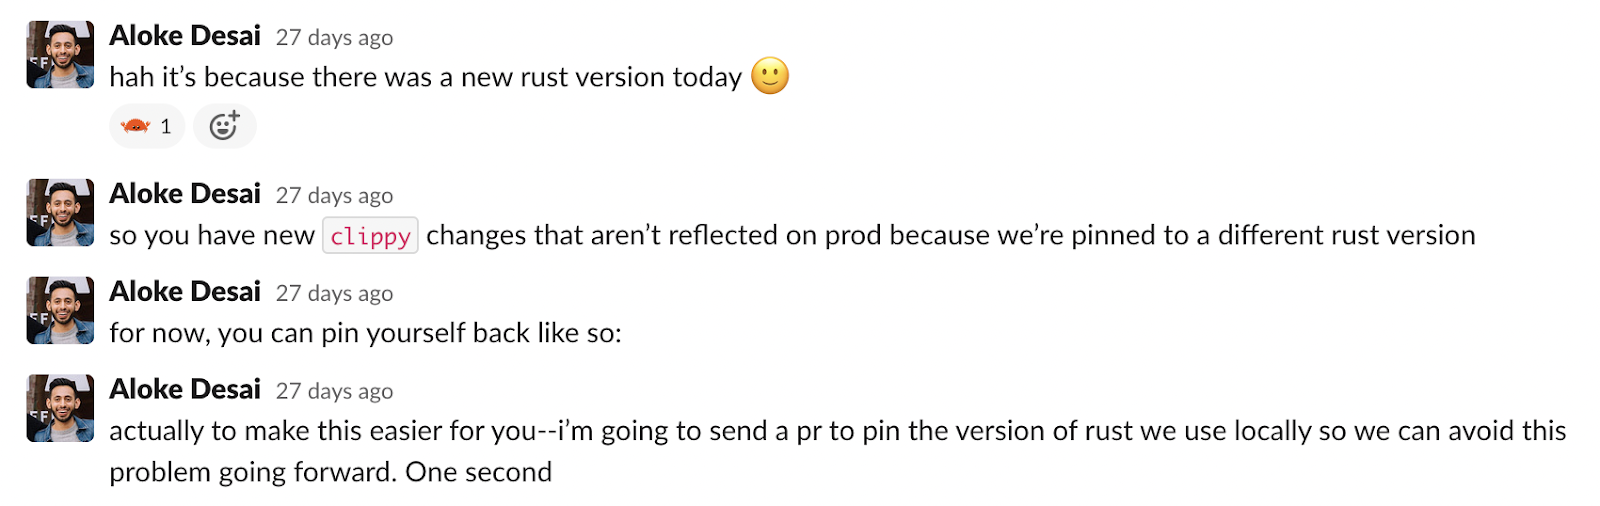
As you can see, the shared block preserves the red to signify an error, blue to point to the specific file and line number, tabbing to signify an actual line of code, and even allows the user to directly click on links to existing Github issues in Rust. On top of that, the output is quite long (56 lines), but the permalink makes it easy to just scroll up and down without having to flip through multiple screenshots (like in the one above, where it is cut off at line 36). Everything above made it easy for one of our engineers to take a look at the permalink and come to a swift suggested fix:
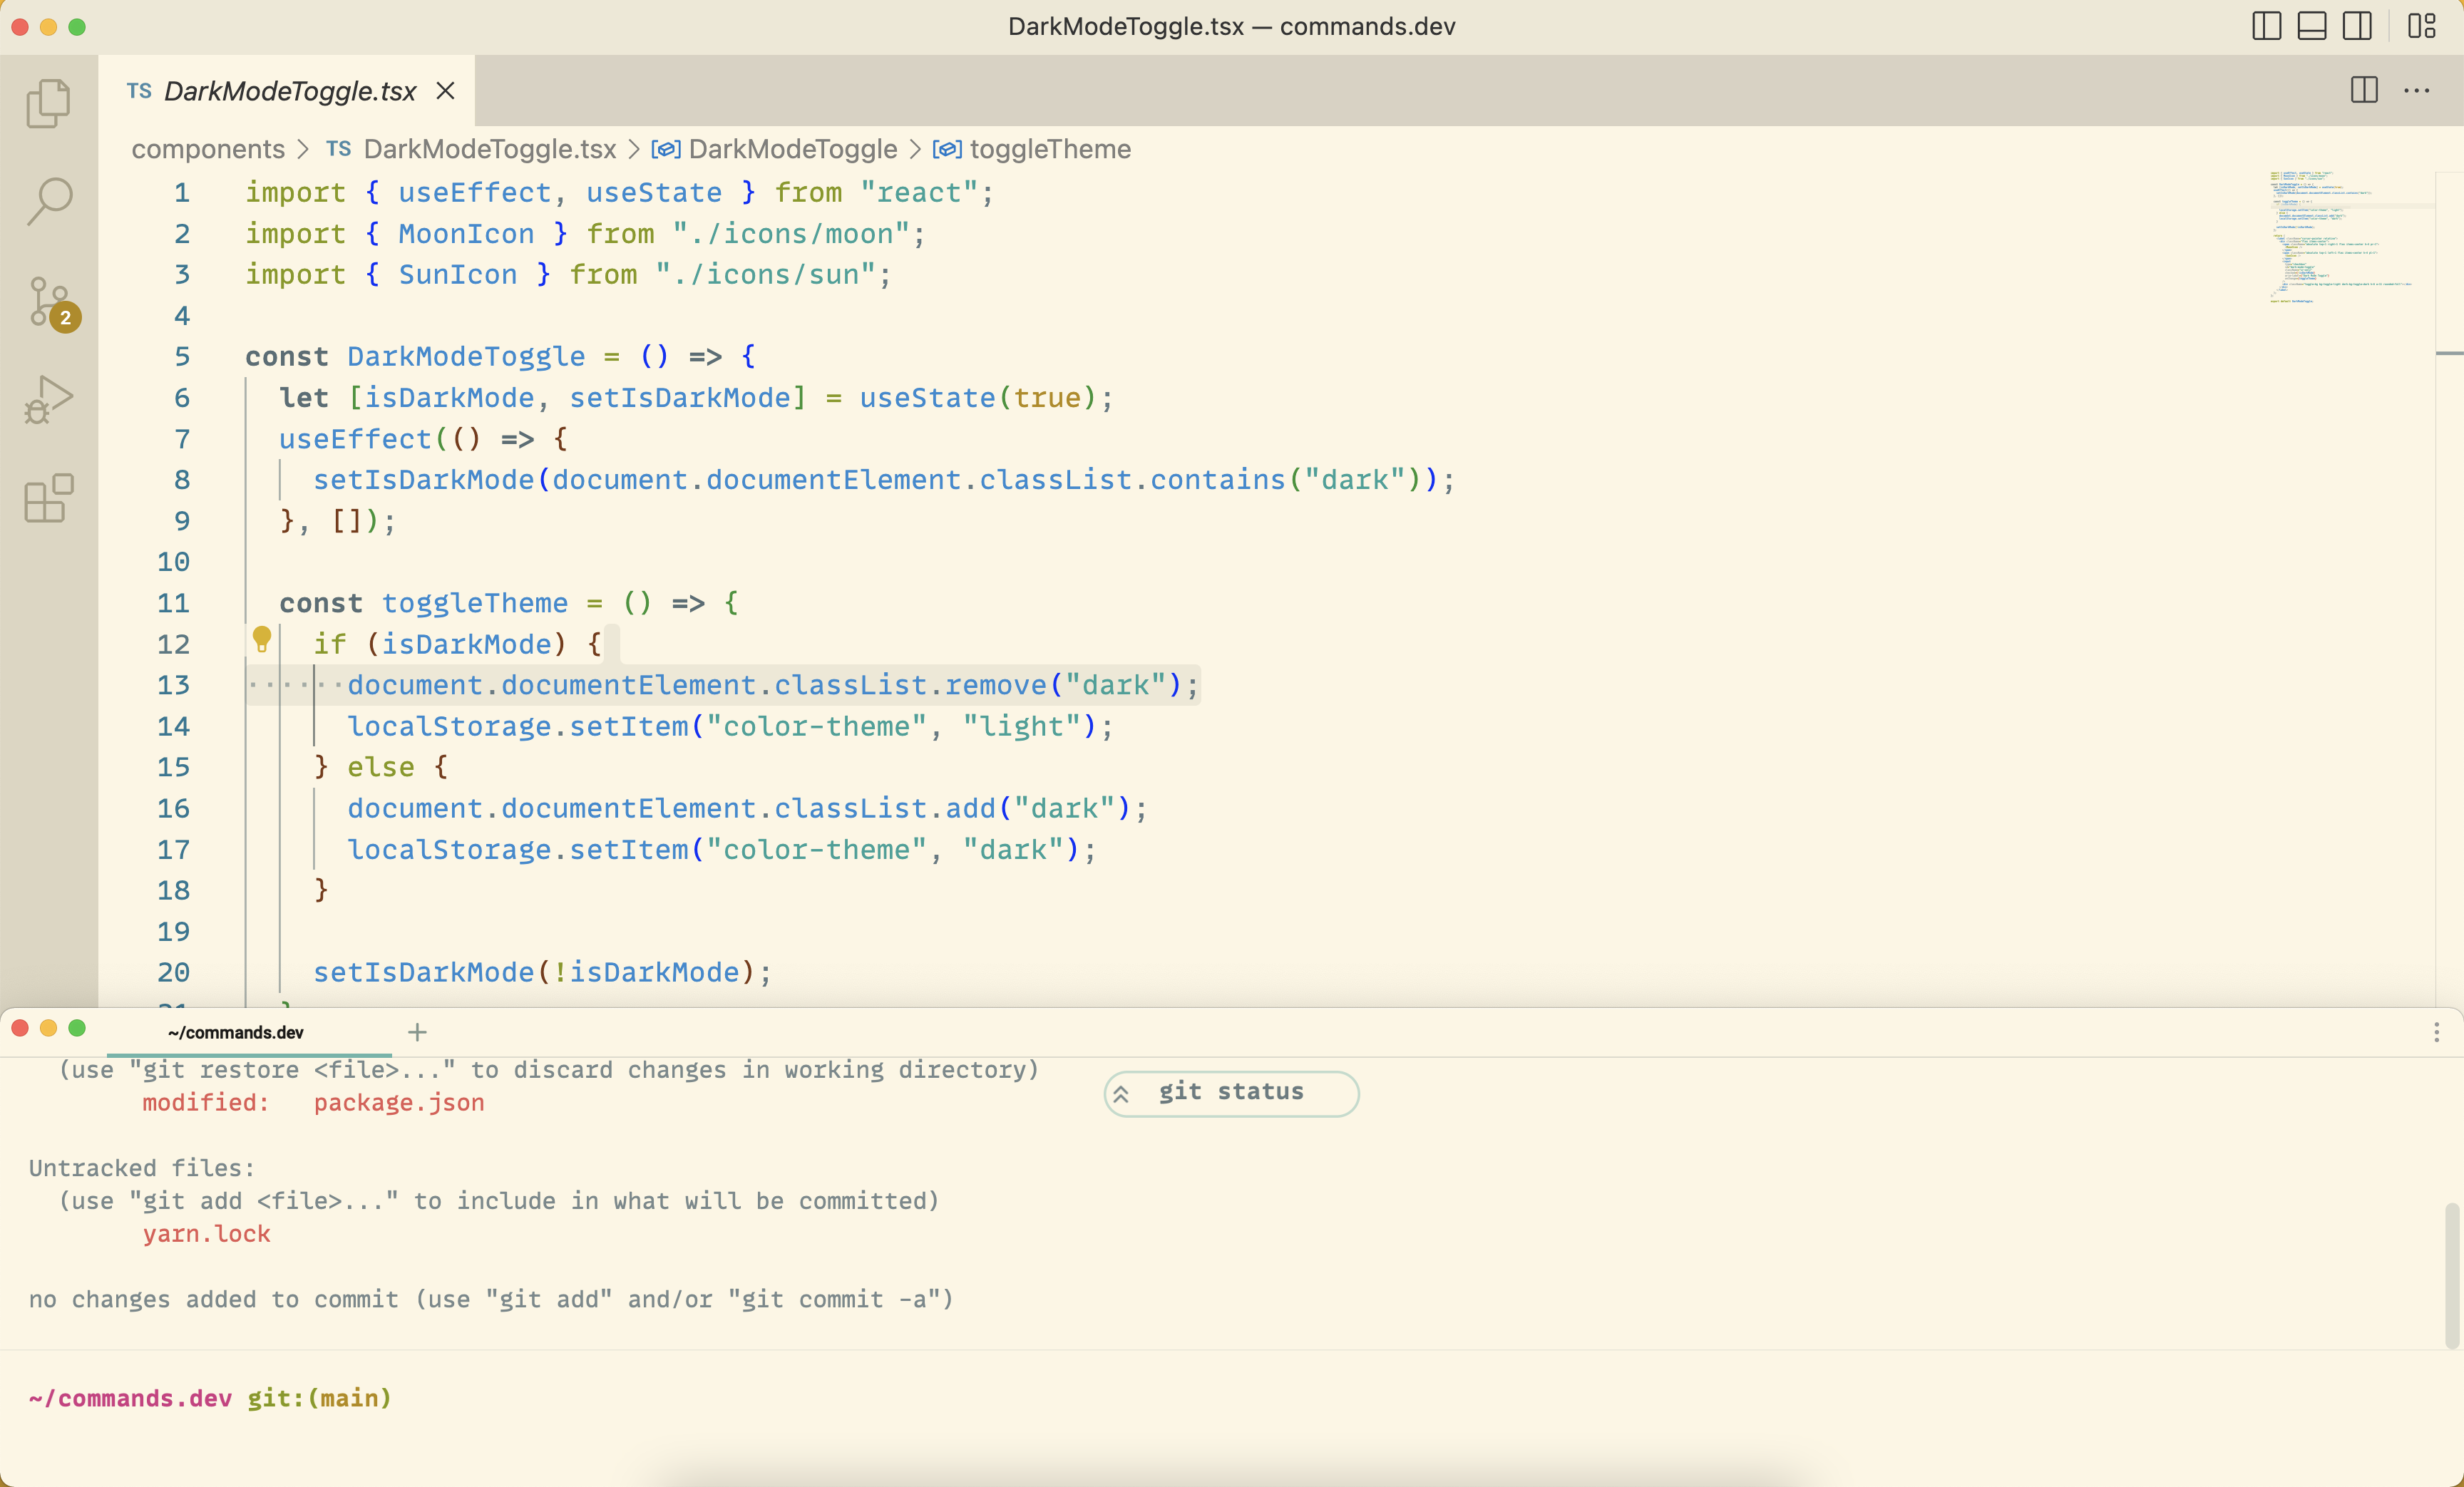
I also use shared blocks to demo steps for engineers that are just onboarding onto the codebase. A few months ago, one of our interns, Abhi, posted a question onto Warp’s #engineering Slack channel asking how to know whether a keyboard shortcut was already mapped to something within Warp. I replied by sharing this block:

The shared block displays a simple grep command that searches the codebase for a specific phrase (in this case, a keyboard shortcut) and outputs all places in the code where the searched phrase exists.
One more fun thing about blocks – they last forever (or at least as long as you want them to)! Blocks are stored under user settings indefinitely until the user decides to unshare them, at which point that data is deleted from Warp’s servers permanently.

Workflows - Ian Hodge (Engineer)
Workflows are a curated list of commands within Warp that are searchable by name or description, and make it easy to recall hard-to-remember commands. They can also be specific to a particular git repository or just stored locally for an individual.
For me, workflows have been particularly useful when I’m on call. For context, workflows can be created at a repository level, so the engineering team created shared workflows for Warp’s internal repo:
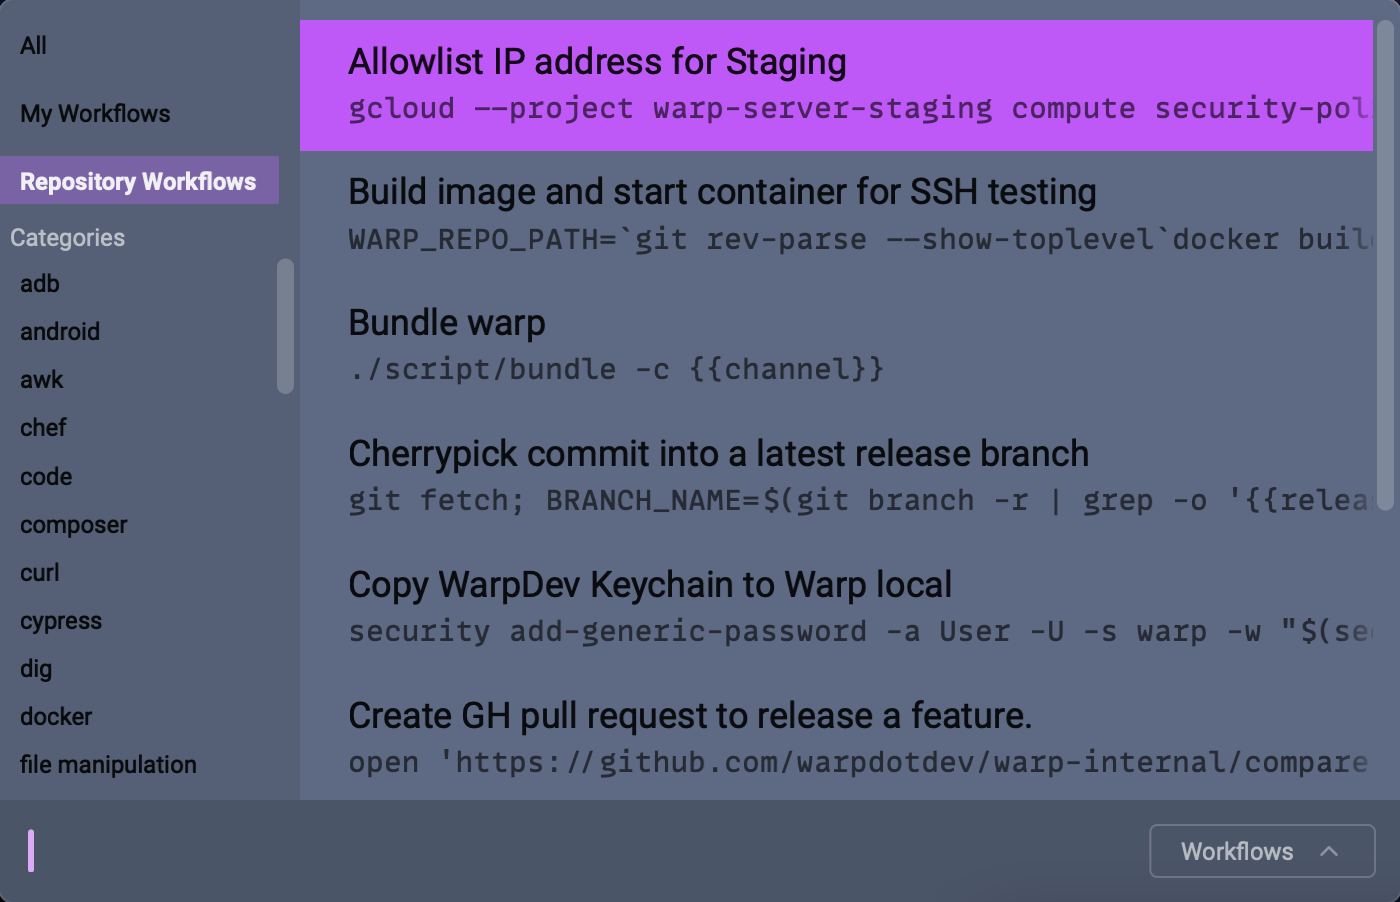
Here’s a list of Warp’s repository workflows:
- Allowlist IP address for staging
- Build image and start container for SSH testing
- Bundle Warp
- Cherrypick commit into a latest release branch
- Copy WarpDev Keychain to Warp local
- Create GH pull request to release a feature
- Create new branch off master
- Run unit test
- Run Warp locally with shell
The workflow that I’d like to highlight is the command to cherrypick a commit into the latest release branch. Here is the full command:
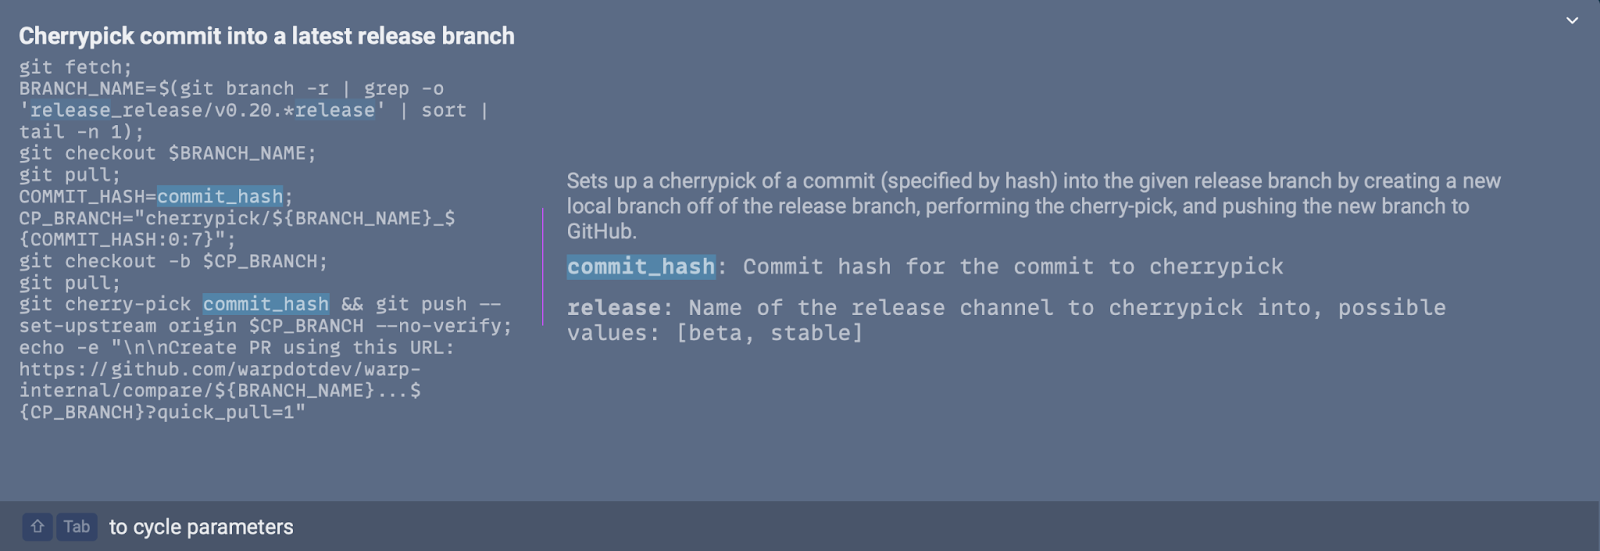
As you can see, the workflow is quite long and almost impossible to recall out of memory (for us mere mortals, at least), especially during on call when engineers are usually running commands they don’t use day-to-day. I use this command to quickly undo breaking changes when issues pop up during my on call week.
On top of that, it’s great for remembering commands that are asked often, potentially from engineers that are just onboarding:


Trying to add an IP address to staging is one of the most commonly asked questions in Warp’s #help Slack channel, since it’s a command that needs to be run for anybody on the team to access Warp’s dev build. We created a team shared workflow so that people could easily find the command - “Allowlist IP address for staging”. It’s quite simple to add a workflow - we just needed to fill out a .YAML file with the name of the workflow, command , any arguments, and the name of those arguments (learn more here).
Here is the command we added:

Quake Mode - Michelle Lim (Growth Lead)
I heavily depend on VS Code as my go-to code editor and realized that there were a lot of Warp features I became dependent on that did not exist in VS Code’s integrated terminal (block sharing, launch configurations, and saved workflows). So I figured out some clever “hacks” to integrate Warp with VS Code using Warp’s Quake Mode feature.
In VS Code, the shortcut to show/hide the terminal pane is CMD + J, so I configured the same keyboard shortcut in Warp using Quake Mode. Warp’s global hotkey setting automatically overrides VS Code’s keyboard shortcut. As a result, I can just rely on muscle memory to hit the right buttons to toggle the terminal, except now it would automatically bring up Warp.
On top of that, I wanted Warp to blend in with my VS Code setup. I set Quake mode to pin Warp to the bottom of the screen, set the width as 100% and the height as 30%, and even matched up the themes by choosing “Solarized Light” in both VS Code and Warp. If you’re curious about how Warp handles themes, you can read our docs here or even use this cool community-created tool to automatically match your VS Code theme to your Warp theme.
There are some added benefits to this approach as well. Quake mode is also known as “Global Hotkey”, and it is called that because the key binding works on an OS level and therefore works across all desktops. Conversely, it is currently not possible to detach the integrated terminal window from VS Code, which makes it hard to reuse VS Code’s terminal session for different setups or projects. This post here even suggests creating a new VS Code window just to work with the integrated terminal in a new window, which is less than ideal.
AI Command Search - Agata Cieplik (Engineer)
AI Command Search is a feature that converts natural language descriptions into shell commands. The feature is powered by OpenAI Codex - if you want to learn more, check out this blog post on OpenAI featuring Warp.
I use AI Command Search to debug performance issues in the Warp app, specifically to extract traces from logs and process the output afterwards.
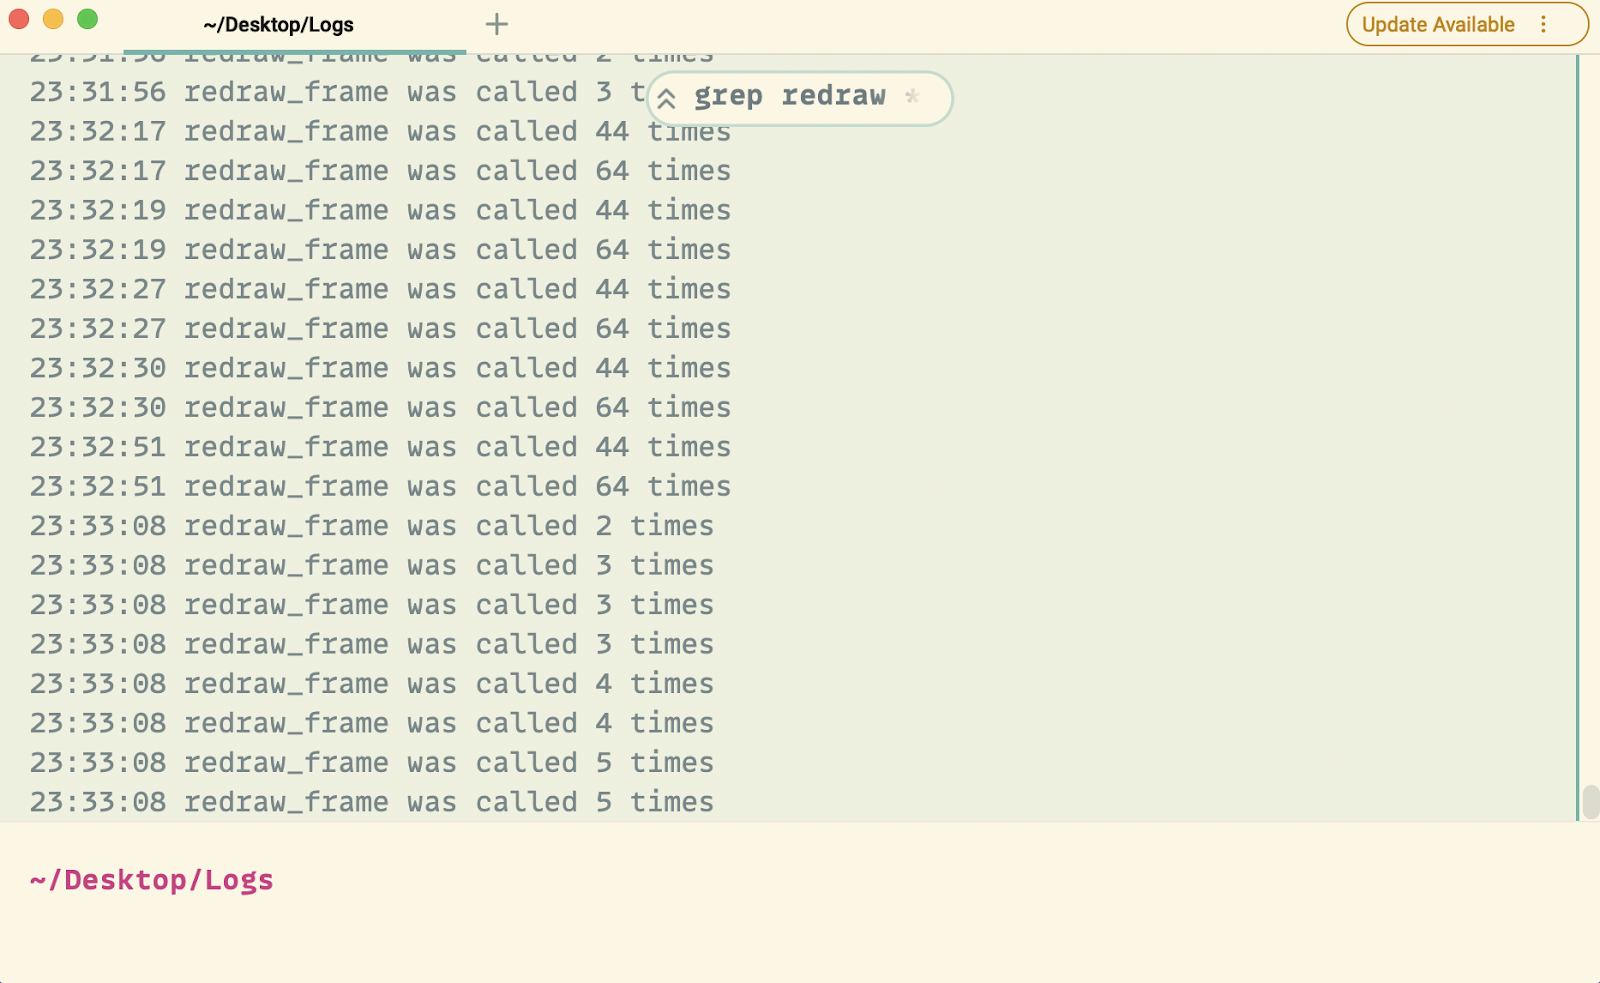
In AI Command Search, I might type something like: “Search for ‘redraw’ in this directory and extract the first and third column separated by space and then sort the output.”

AI Command Search generates the command: grep -i redraw \* | cut -f 1,2 -d " " | sort
And the output:
At this point, I would start to analyze the output and weave together a story of how this specific trigger can be tied to performance and rendering slowness in Warp. Before AI Command Search, I had to write these commands from scratch. For example, I might first write the grep command, run it to see the output, then play around with the cut command and its flags to correctly parse the logs for relevant information, which usually takes a few tries. With AI Command Search, I can simply input in English (or whatever natural language you prefer) what I want to do, and get a nice grep + cut + sort pipeline that runs everything all in one fell swoop.
Start your software factory
Book a demo and we’ll walk you through the workflows that map to your stack.
Related articles

Jul 18, 2026 · 4 min
Get agents off your machine
Even though we are living in 2026, it feels like folks have forgotten the lessons of 2006: software belongs in the cloud, not on individuals’ desktops.

May 20, 2026 · 6 min
Bring your own inference to Warp
Today we’re releasing one of the most requested updates from the Warp community: more control over inference.

May 19, 2026 · 6 min
A single pane of glass for managing all of your cloud agents
With Oz, engineering teams can now integrate, orchestrate, control, and improve any cloud agent at scale including Claude Code, Codex, Warp Agent, and whatever comes next.