Hello factory
What we’ll cover
Build a simple implementation factory that can accept prompts and create pull requests.
Let's build our first factory. We're going to start simple: building a single "implementation" worker that takes in a prompt and generates a pull request.
Prompt
You send the request from factory chat. The foreman reads it and starts the blueprint at its first stage.
We'll be modeling our factory using a multi-stage workflow, which we call a "blueprint." This lets you describe your factory like a state machine, declaring what to do at each stage and modeling the inputs and outputs as structured data.
This example has three stages: task input, implementation, and handoff. Each stage can define the inputs and outputs that it expects as structured data, which your workers will massage into the right shape before passing along.
- The task input stage (the start of your factory) receives the user's prompt as context and hands off directly to implementation. This is passed along as a
requestfield. - The implementation stage is prompted to implement that request, open a draft PR, and output the
pr. - The handoff stage receives a
reportwith the builder's result, summary, and PR link, and delivers it to the sender before completing.
These stages are modeled as keys on the blueprint property of your factory.yaml like so:
agentDefaults: model: glm-5.3-fireworks runner: defaultblueprint: start: to: implement stages: implement: inputs: |- request: the requester's ask in its exact words, with links and attachments. outputs: |- pr: the pull request that was opened or updated. prompt: file: stages/implement.md to: handoff handoff: inputs: |- report: the builder's result, summary, and links. prompt: Deliver the PR to the requester. to: endWe'll also add a prompt for the implementation stage as a separate file to make it easier to amend as we go along:
# Implement

Implement the change as described, and use static checks to verify your work. Skip computer use verification.
Setting up a two-worker system
You might be wondering: Why do we have these separate "input" and "handoff" stages? Can't this just be one stage with a prompt to "just do it?"
It's a fair question, and you could simplify this blueprint further to just instruct one worker to implement and hand back to the user. However, this will affect your experience interacting with the factory while it works.
Say we sent a follow-up to the factory like "what is the status on this pull request?" With a single worker, it'll need to stop work, address the user's question, and return to work. This is fine, but it can slow down development or add noise to the worker's context window for longer sidebars.
By splitting into separate stages for task input, implementation, and handoff, we have the flexibility to use separate workers, with separate model selections and context windows, for each of these stages:
- The foreman: answers user questions and routes implementation tasks at the "input" and "handoff" stages
- The builder: writes code and generates the pull request at the "implementation" stage
Every worker gets its own sandbox with a message-passing system to communicate between them. If you're familiar with "subagents" or "agent orchestration," this should feel familiar to you.
Let's define each of these workers by creating new entries in the workers/ folder for our factory definition, using the format workers/NAME/worker.md. If you have existing workers in this folder, remove them first. Each will get a simple prompt defining their role:
---
description: Orchestrates the factory workflow and dispatches each gated step.
agentType: FOREMAN
---
# Foreman

You are the orchestrator ("foreman") of the software factory. The factory is a team of workers that automates the software development lifecycle from start to end. You accept work into the factory and keep the work in motion. For the most part, you do not do all the work yourself; you delegate to other workers to handle different parts of the lifecycle, like triage and implementation.---
description: Implements a change and hands back what it proved.
---
# Builder
You implement one change at a time. Work from the brief you were given: make the change in the repository, follow the repo's own agent guidance, and verify your work. Report back what you did, what you ran, and links to the result. If you are blocked or the brief is ambiguous in a way you cannot resolve, say so and stop.Now, we can attach each of these workers to stages of our factory using the worker field. We'll apply the builder as the owner for implementation, and the foreman as the owner of input and handoff.
agentDefaults: model: glm-5.3-fireworks runner: defaultblueprint: worker: foreman start: to: implement stages: implement: worker: builder inputs: |- request: the requester's ask in its exact words, with links and attachments. to: handoff handoff: worker: foreman inputs: |- report: the builder's result, summary, and links.Let's hit "save" on the Factory definition page. Warp validates the files, commits them, and applies the new blueprint.
- factory.yamlblueprint added
- workers/foreman/worker.mdnew
- workers/builder/worker.mdnew
- stages/implement.mdnew
Send your first real bug report
Now let's see if our factory can do real work. Open New Chat, select your factory, and send this suggestion. This will add yaml language support to code blocks in our markdown app:
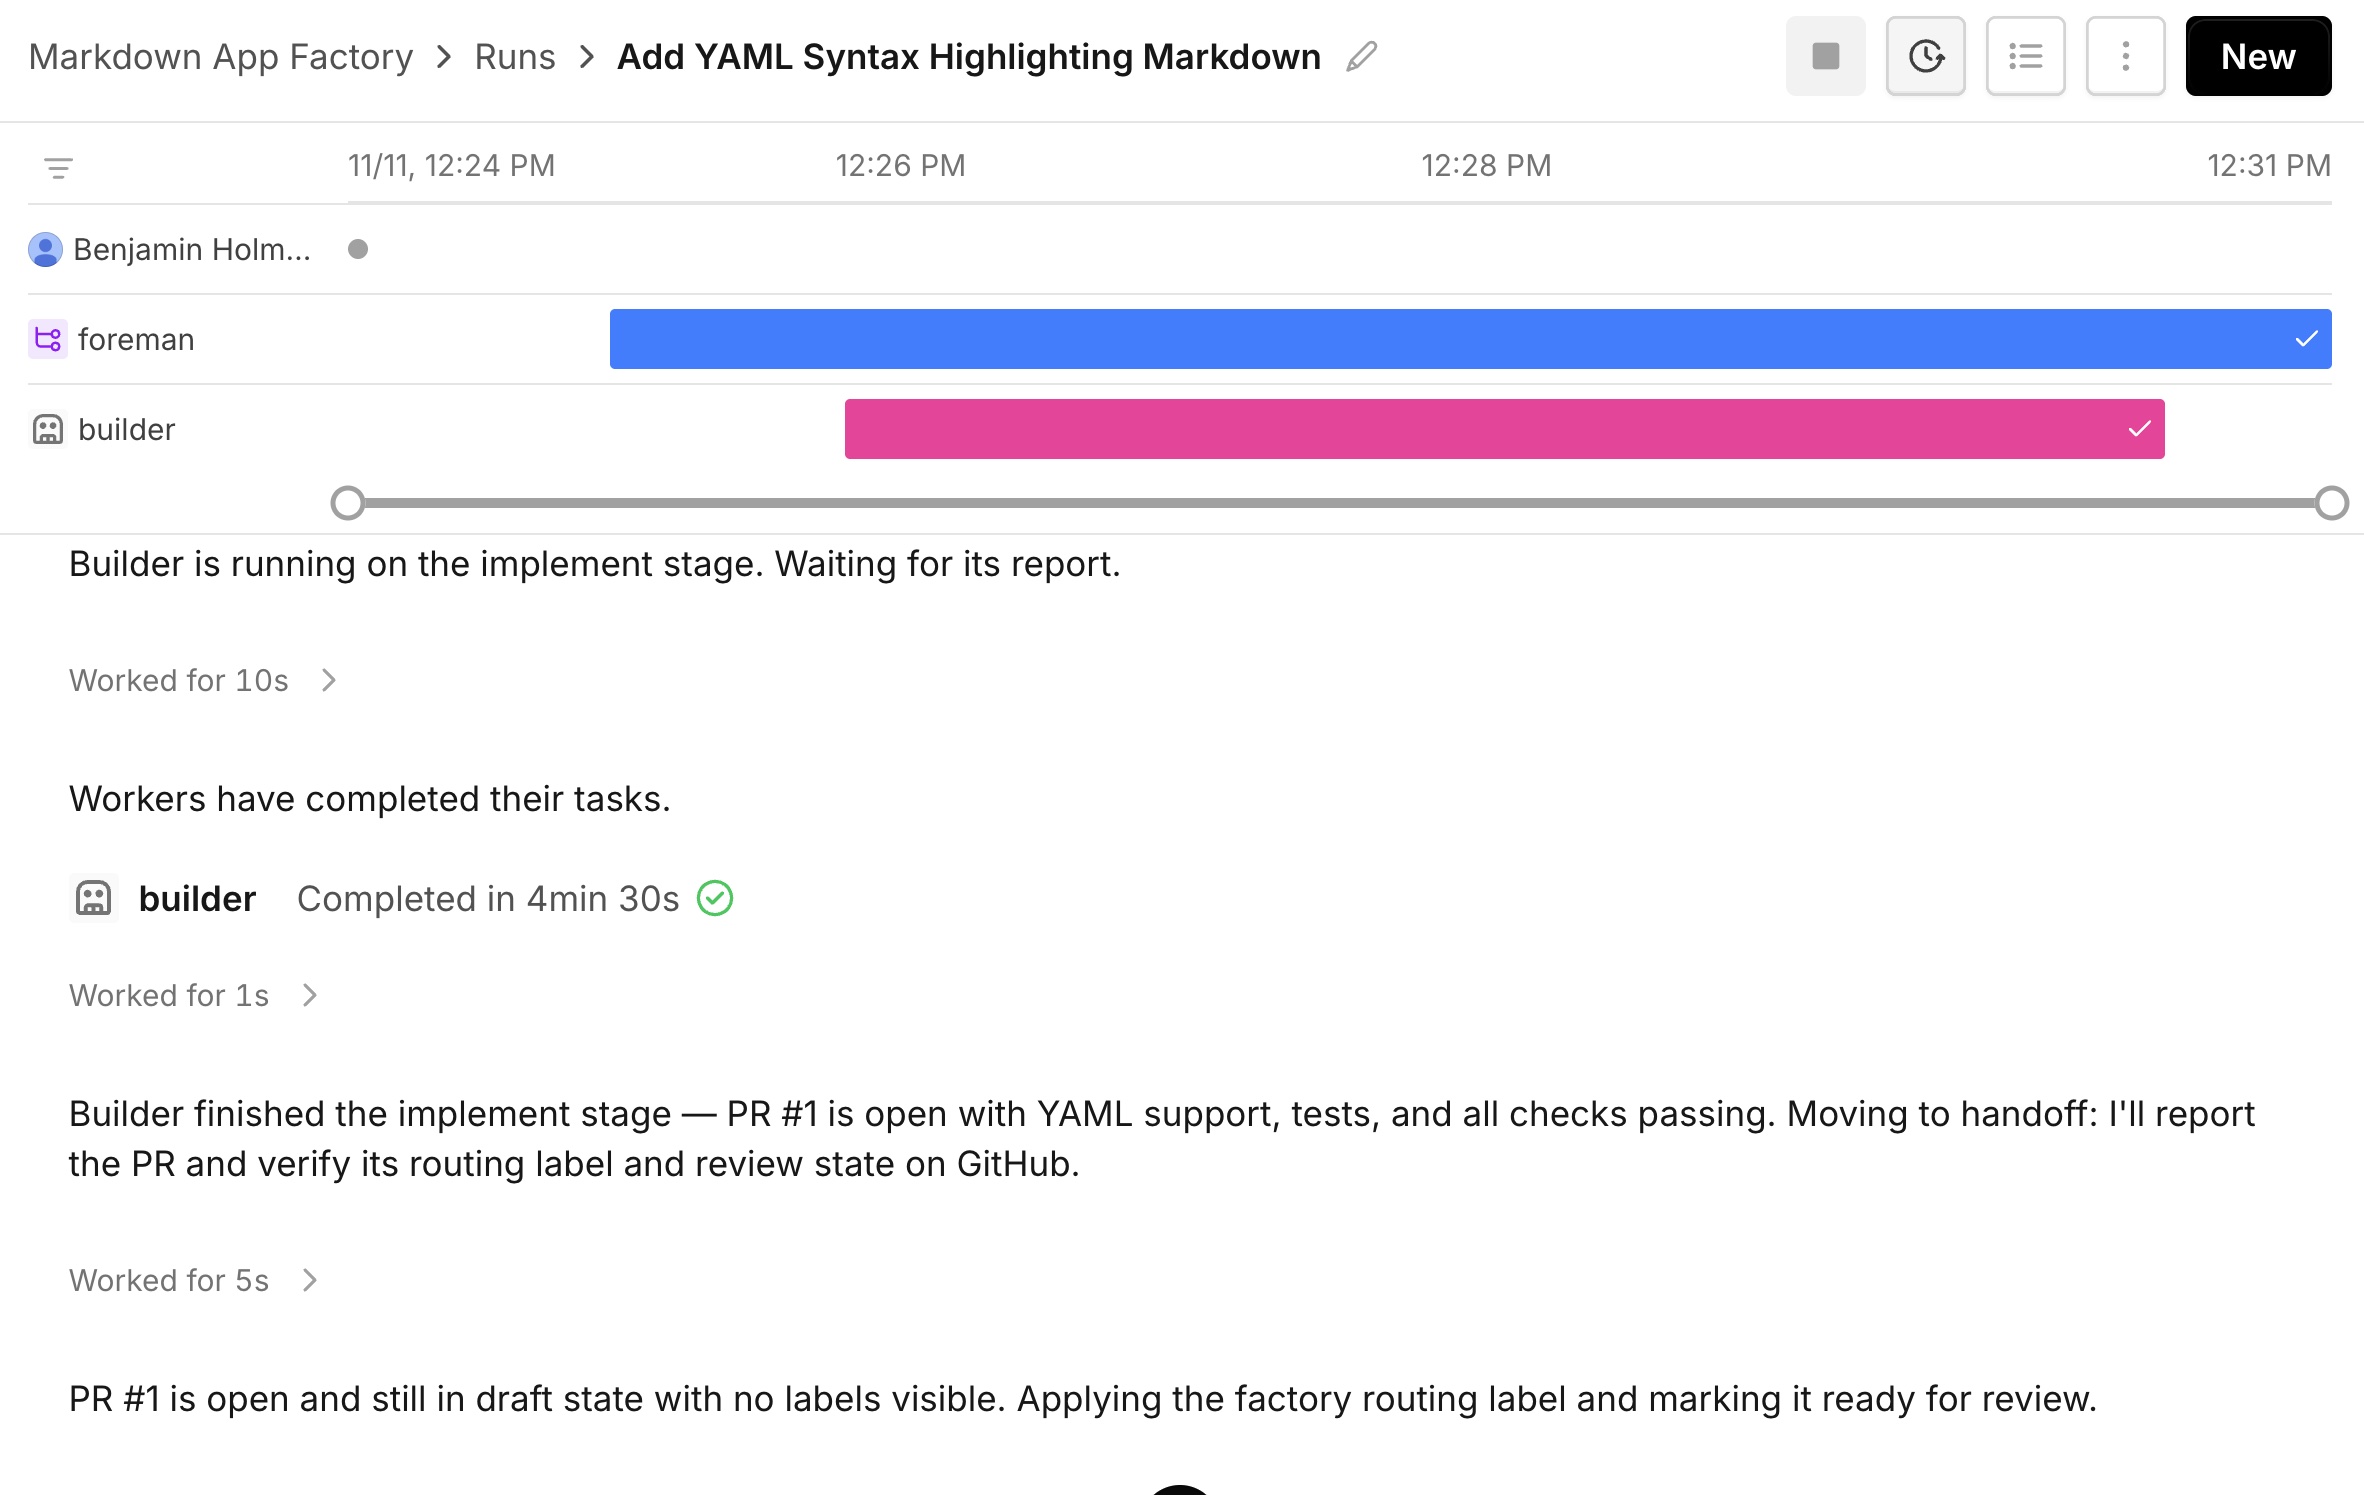
Add YAML support to markdown code blocks. A fenced code block tagged yaml should show YAML in the code block language picker, be selectable from the picker, and get syntax highlighting.As you watch the chat, you should see the foreman process the request, then hand off details to the "builder" worker for implementation. You can click into the "builder" to see what it's working on. Once it finishes, the builder should create a draft PR that the foreman sends to the main chat view.
Review the pull request
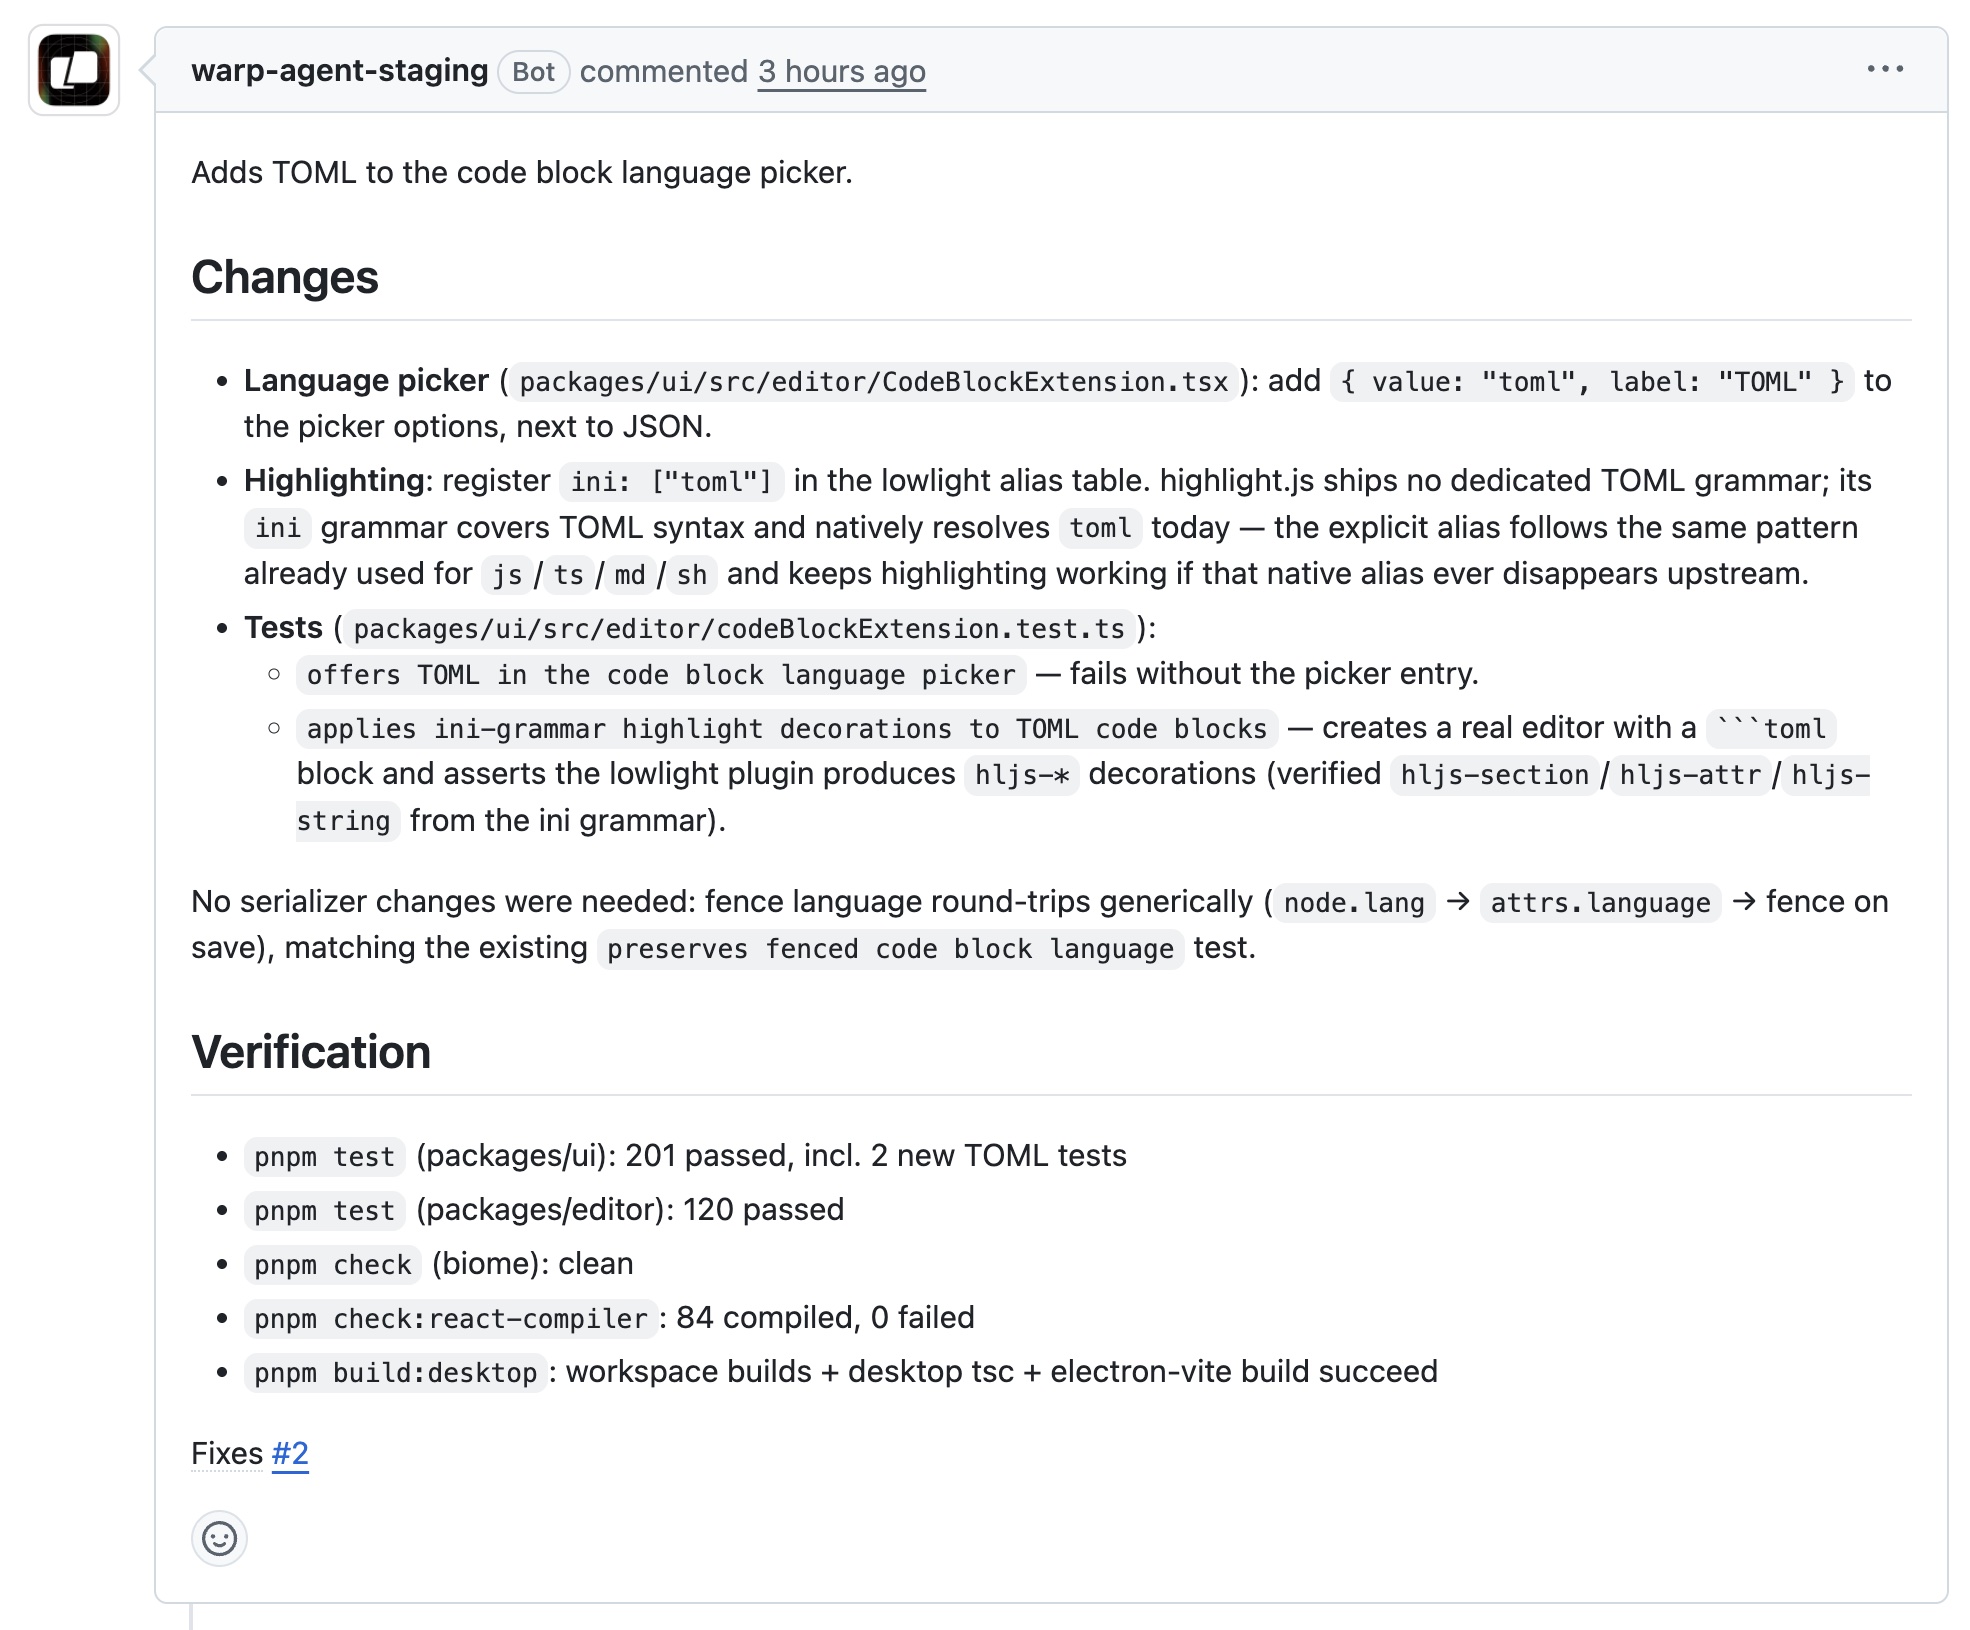
With any luck, you should see your first factory pull request come through. Yours will differ in the details, but should have the same shape:
- A small change: YAML added to the language picker in
packages/ui/src/editor/CodeBlockExtension.tsx, reusing the YAML grammar the editor already ships. - A description that says what changed and how it was checked, for example
pnpm build:desktop,pnpm check, and the existing tests. - The code is waiting to be merged. That's the human's job still!